Here is a tip that I bet you haven’t heard about!
Did you know you can name pins in your material editor?
If you would prefer to watch the video version, check it out here
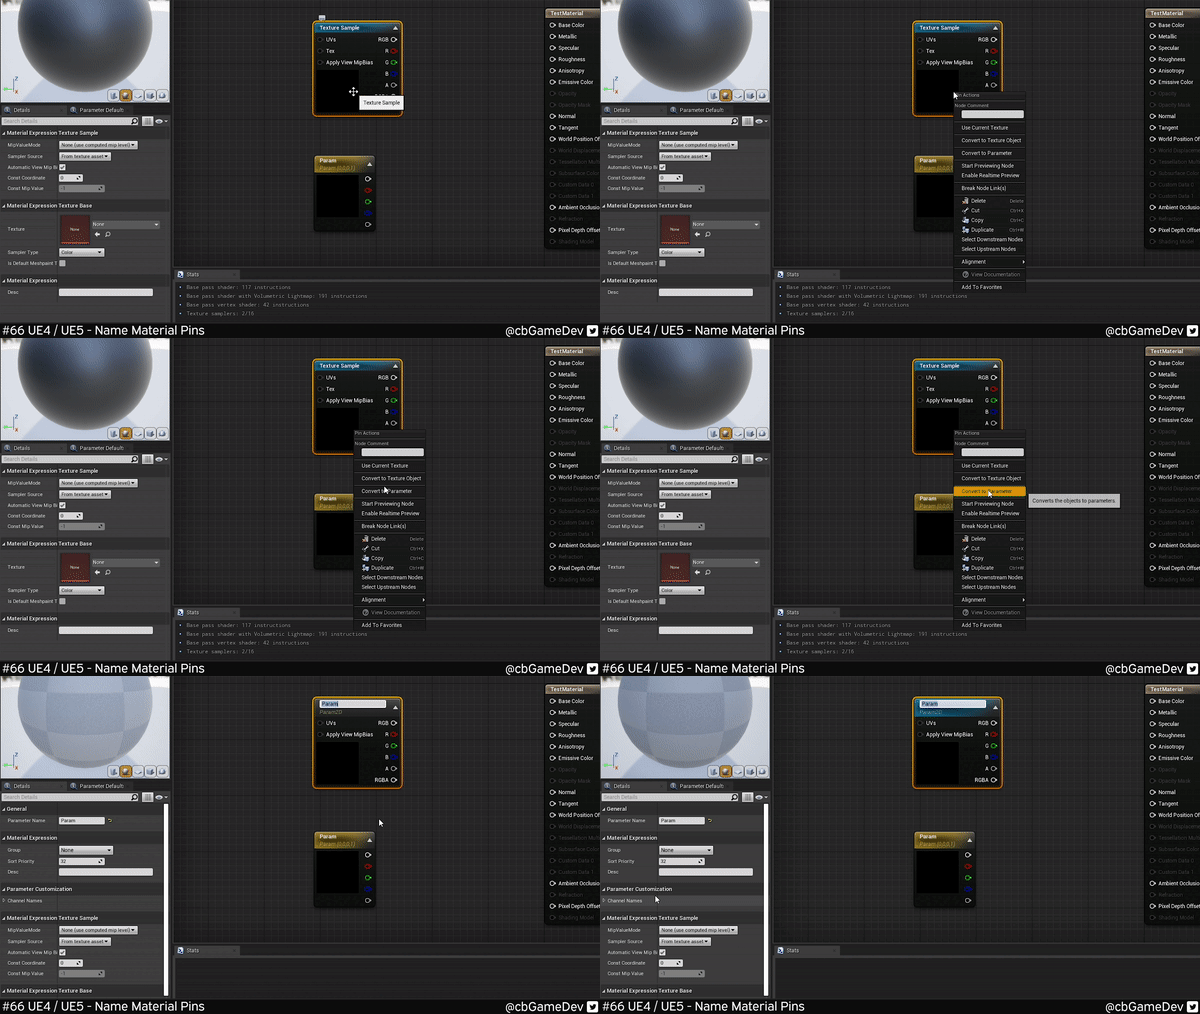
This is a great tip for helping keep things organised and it’s simple to do. You can see it in action in the comparison below.
First off this will only work on material nodes that can and have been turned into a Parameter. For example a Texture sample. To do this, right-click on your node and go down to Conver to Parameter.
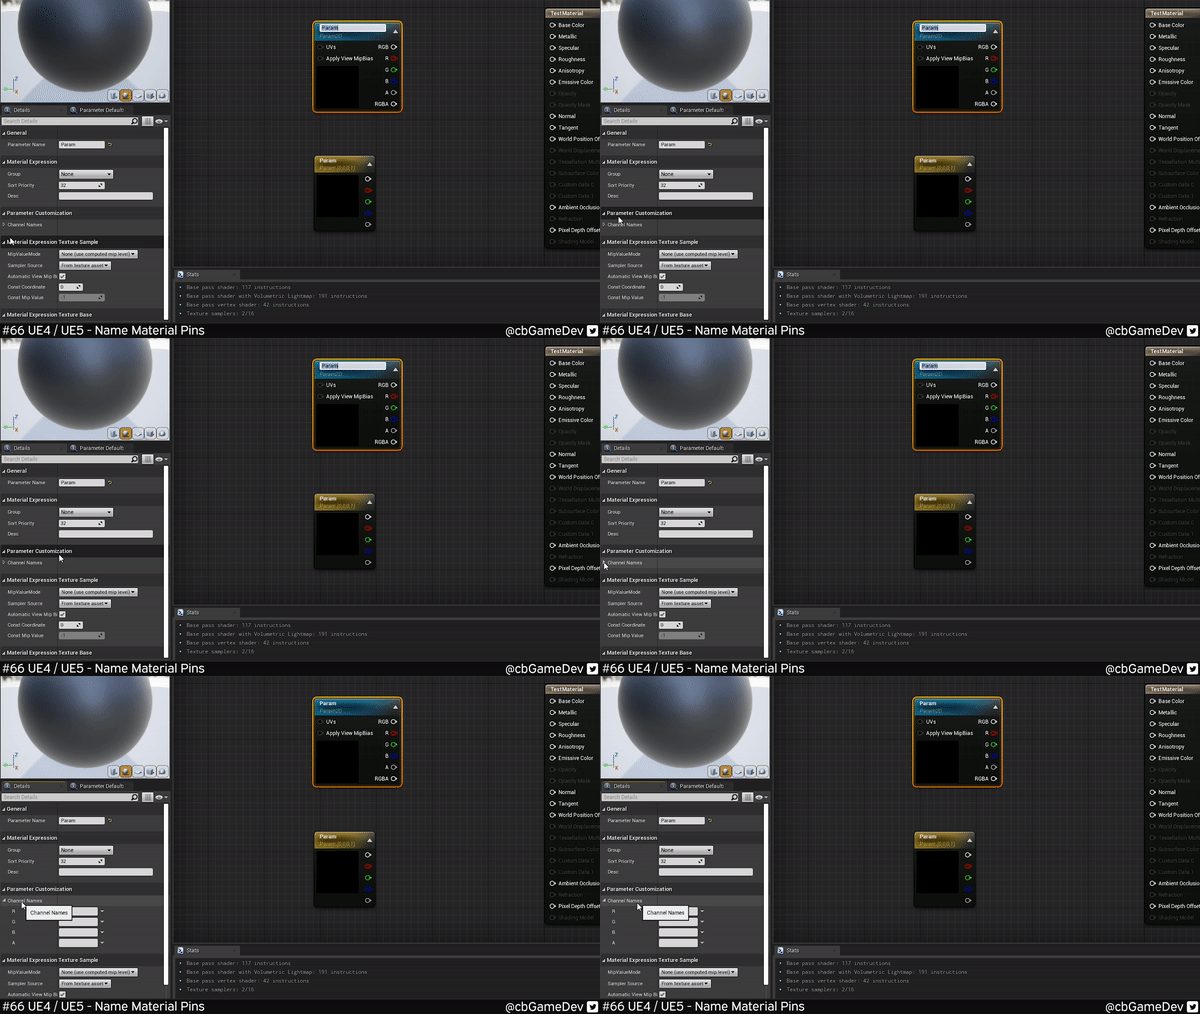
If we now look at the details panel on the left we will have more options. Including the Parameter customization. If we click its rollout we will get the settings that we need.
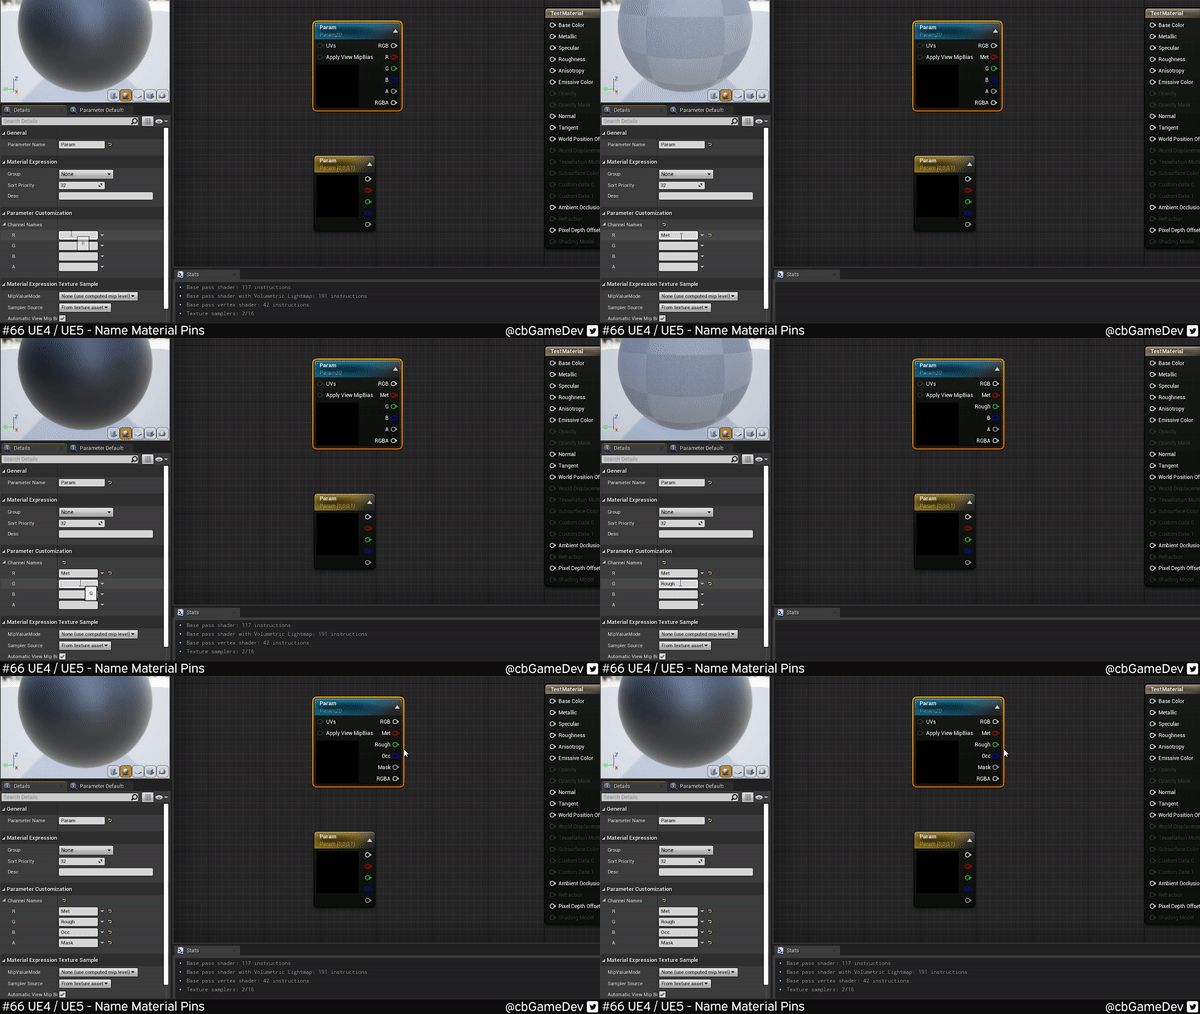
Here you will see text fields that correspond to the Red, Green, Blue and Alpha channel of our texture sample node. We can write whatever we want into these and they will appear on the node’s pins instantly.
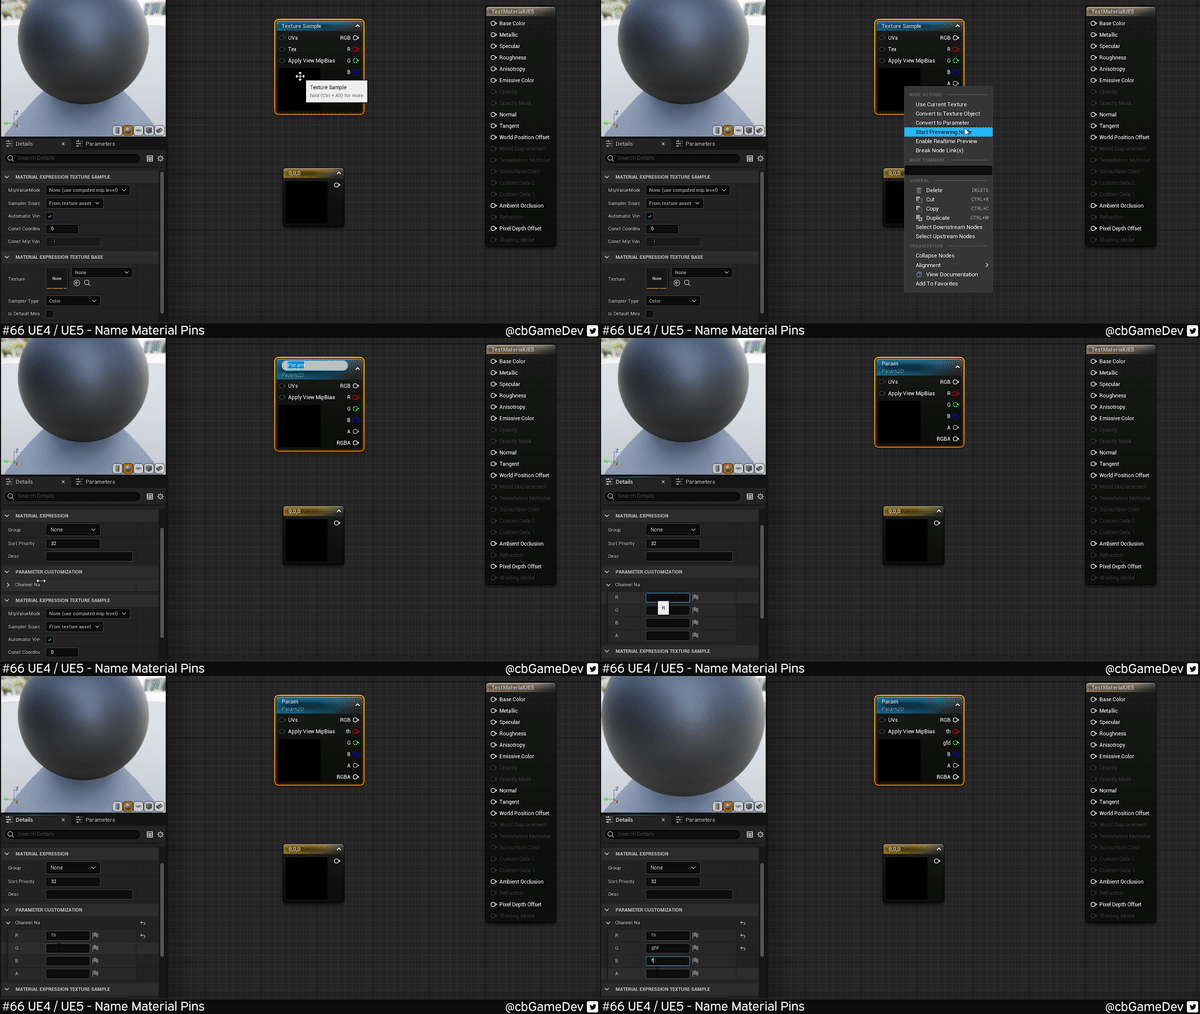
This also works in exactly the same way in the Early Access Version of Unreal 5 as well.
The cool thing about this is that you can name your channels based on how you are packing them, to keep things tidy. So for example roughness in Red or AO in Red, whatever personal preference you have. It also makes it easier for other people to work on your material as well as making it easier for you if you ever need to come back to the material. You can know at a glance what’s going on and what you were thinking at the time.
If you want more quick tips & tricks FOLLOW ME ON TWITTER @cbGameDev
Also, check out the parkour game I'm solo developing called Freerunners. Give it a wishlist if you like the way it looks!: https://store.steampowered.com/app/1430330/Freerunners/


