QUICK DEV TIP #106 UE4 / UE5 - Toggle Debug Camera
This trick has existed ever since the Unreal Engine 4 days!
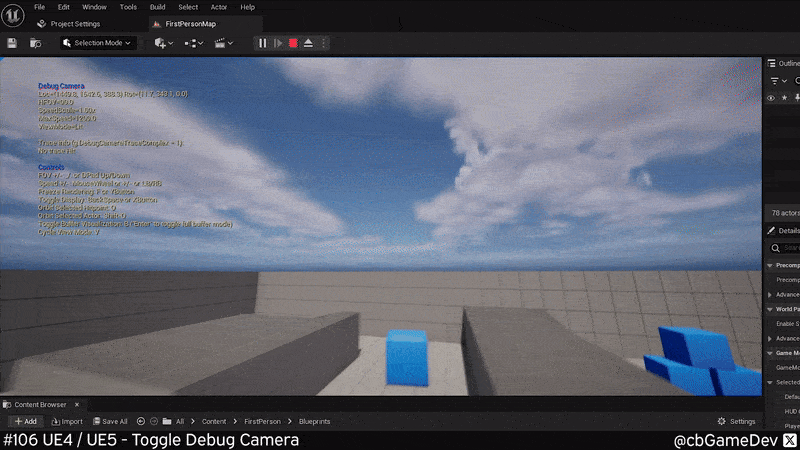
Did you know that Unreal has a debug camera that you can access when you're playing?
If you would prefer to watch my video version, check it out here
Accessing this Debug Camera while playing is super easy. Simply bring up the console with the tilde key and then type in ToggleDebugCamera to activate the mode.

You will snap into a flying camera view and a list of information will appear on the left hand side of the screen.

You can fly around, similar to how you would navigate in the editor viewport. You can use E to go up and Q to go down and you are also in a noclip/ghost mode so you can go through things as well.
You can deactivate this mode by bringing up the console and running the same command again: ToggleDebugCamera
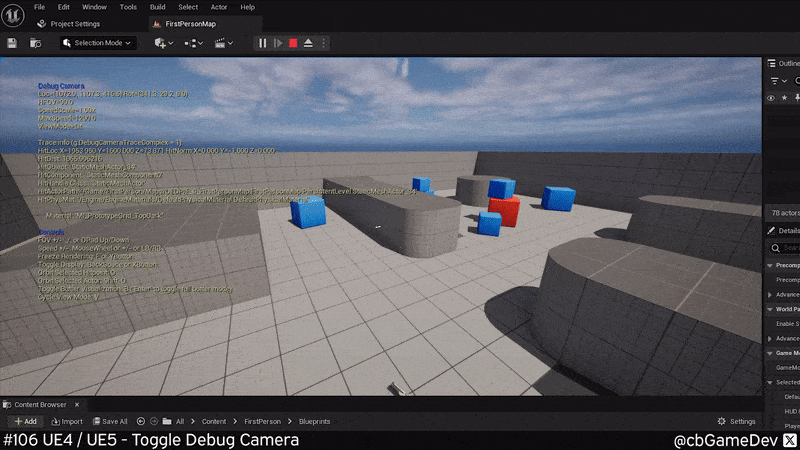
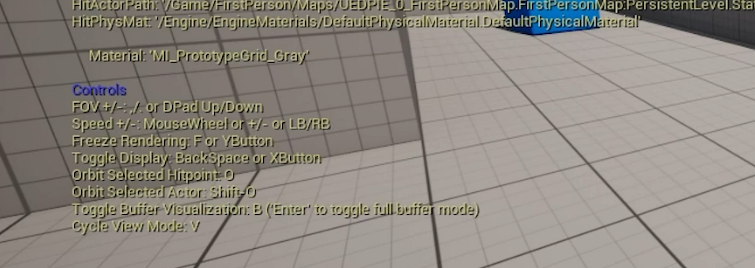
There is a constant trace running from the center of the screen so when you look at assets in your level we can see some information. If you look halfway down the list of information on the left you can see the material of the asset you are looking at. In my example below you can see it switching from the wall to the cubes material. We can also see the physical material applied to that material as well. Something which could be very useful for debugging.

At the bottom of the list on the left-hand side, we can see how to access a bunch of extra useful view modes as well.
We can Freeze rendering by using the F key. Below you can see me do it then turn around to see that the assets which were not rendered when I was looking the other way. We can turn this mode off by pressing the F key again.

We can press the B keyboard key to toggle a Buffer Visualisation view mode. This is pretty cool, allowing us to see further information about the level as you are moving through it. You can turn it off by pressing the B key again.
We can press V to cycle through view modes. Allowing us to see Unlit, Wireframe, Detail Lighting, Reflections, Collision Pawn, Collision Visibility.

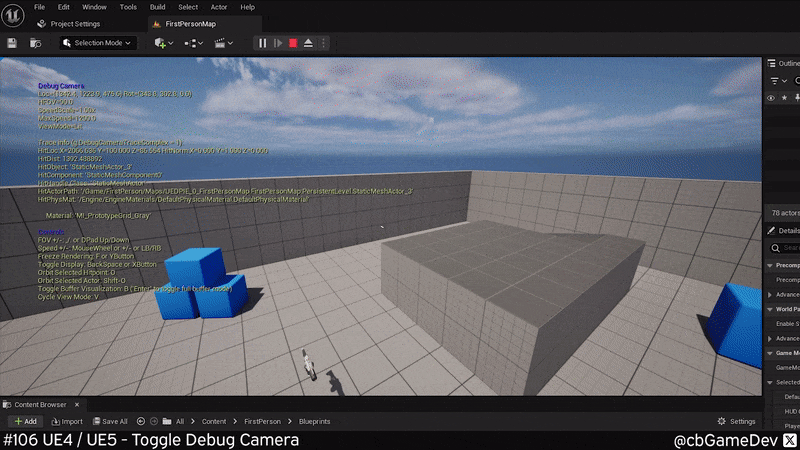
Another interesting control that we have is to orbit assets. This feels like it was designed for showcasing and reviewing assets more easily. In my example below you can see how I go up to a cube and then Left-Mouse-Click, to make it my target. This changes the colour of my line trace and I can then press Shift + O to trigger the orbit mode. This allows me to rotate freely around the asset as if it were the camera’s pivot.

Interestingly, this is another one of those things that has existed in Unreal for a long time. I went back to UE 4.25 project and it worked in exactly the same way there (using the console command ToggleDebugCamera).

I literally only just found out about this the other day. I think this is something I will end up using a bunch, it seems useful and especially so because it also works in cooked development builds. It’s definitely worth knowing about!
If you want more quick tips & tricks FOLLOW ME ON TWITTER @cbGameDev
Enjoyed this? Check out my other work: